
Channel Back #2: Guess what happened when I upholstered this one?
In upholstering my 2nd channel back chair, I had 3 issues!

If you have been following along with this blog, you know that I just returned from some upholstery classes where I had the opportunity to learn some advanced skills, button tufting and a channel back chair. You can read all about my class adventures here. Now what really works for me when I learn something new in upholstery, is to immediately work on a new project using the same skills.
When I came home from North Carolina, I stalked Facebook Marketplace and Craigslist for a channel back chair. There were just none to be found, except a few in the $300-400 range and that is just a tad too rich for me. I finally found one located near the Tennessee Alabama border. Now this was a little far for me, about 80-90 miles south, but I just wasn’t finding anything in the Nashville area. I called Dwayne, the man that had the chair. We started chatting and I told him I was looking for a channel back to practice my new skills on. He told me he had a second chair like the first, and maybe I’d want that one too? I wasn’t too sure about that, but I set off to get the first chair.
Let me just say, Dwayne is a sweetheart. Seventy years young and a widower twice over. He and his brother dabble in buying and selling used furniture in hopes of making green fees. Now he really didn’t want to get rid of the 2nd chair, cause it’s his favorite. Most comfortable chair ever! But it was in need of some serious love. The fabric on the seat had ripped and the previous owner had use some type of glue to try to repair the rip. The glue ate into the foam and made it hard.
We struck up a deal for me to reupholster his favorite chair at a greatly discounted rate, in return I got to practice doing a channel back, and by the way, he gave me the chair I had originally gone to buy. Yes this was a great deal for Dwayne! But I have no regrets, it was great to work on a chair with no stress. The client had no expectations that the chair would be perfect since it was for practice! He’s in for a surprise!
He didn’t have any fabric for the chair, but I have quite a hoard of fabric that I got mostly at an fabric outlet. So we decided to try to find something from my stash. (Win-win – I get to reduce my hoard!) Dwayne told me he’d be very happy to have the chair recovered in the same fabric that was on the chair. This fabric was a dated silk-like cream brocade type fabric. He said it looked ‘formal’ and he wasn’t fancy but he like to fool people! Haha! Dwayne is quite the character. I like him!
Issue #1
The first issue I had in tackling this chair is that I didn’t have a fabulous teacher, aka Cynthia Bleskachek, standing next to me in my she shop! Haha!! Well that’s kind of the point. Now I had my notes and my memory. Oh dear!!

That’s why I need to tackle a second project soon after completing the first. But I did run into a few questions. I know I could have reached out to Cynthia and she would have helped me out. But part of why I want to work thru the project is to figure it out myself. If I make mistakes, I’ll be more likely to remember them in the future. By the way, the seam ripper got quite a work out, as you’ll soon learn.
Issue #2
The next problem arose when we decided on the fabric to use. As I stated, I have a huge stash of fabric and was so happy to use some of it for this project. I bought most of this fabric at an outlet type store and the price fit Dwayne’s budget perfectly.
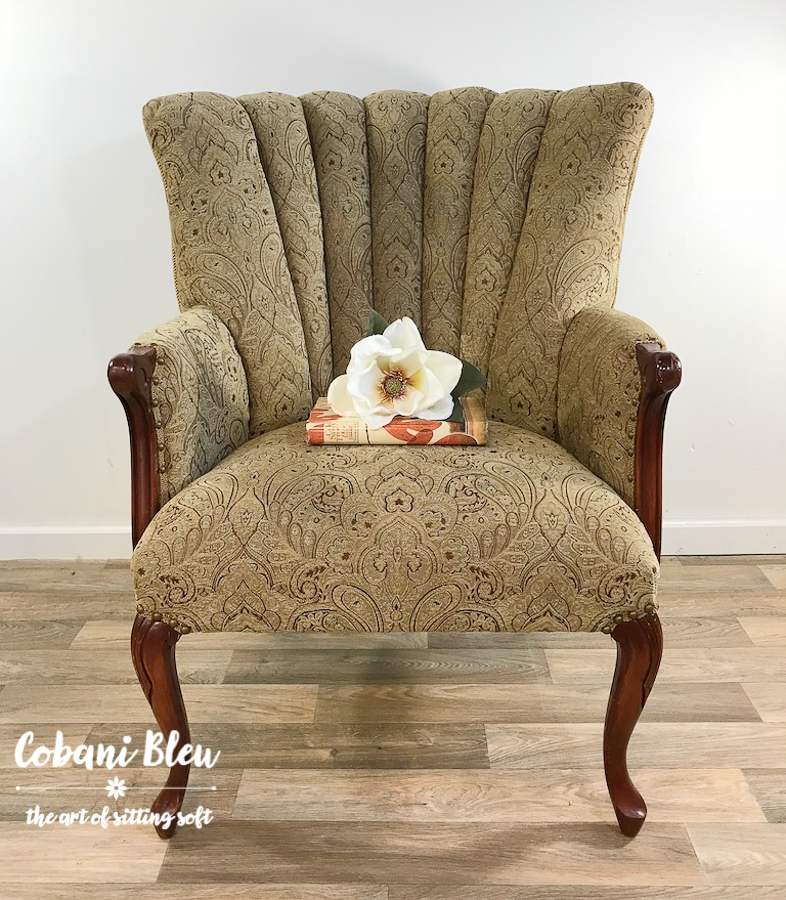
The fabric we decided on has a nice all over damask type print in a light brown with a touch of blue and gold. Remember Dwayne preferred something with a formal feel to it. I thought this fabric was a good choice. Not too feminine but still a bit fancy!
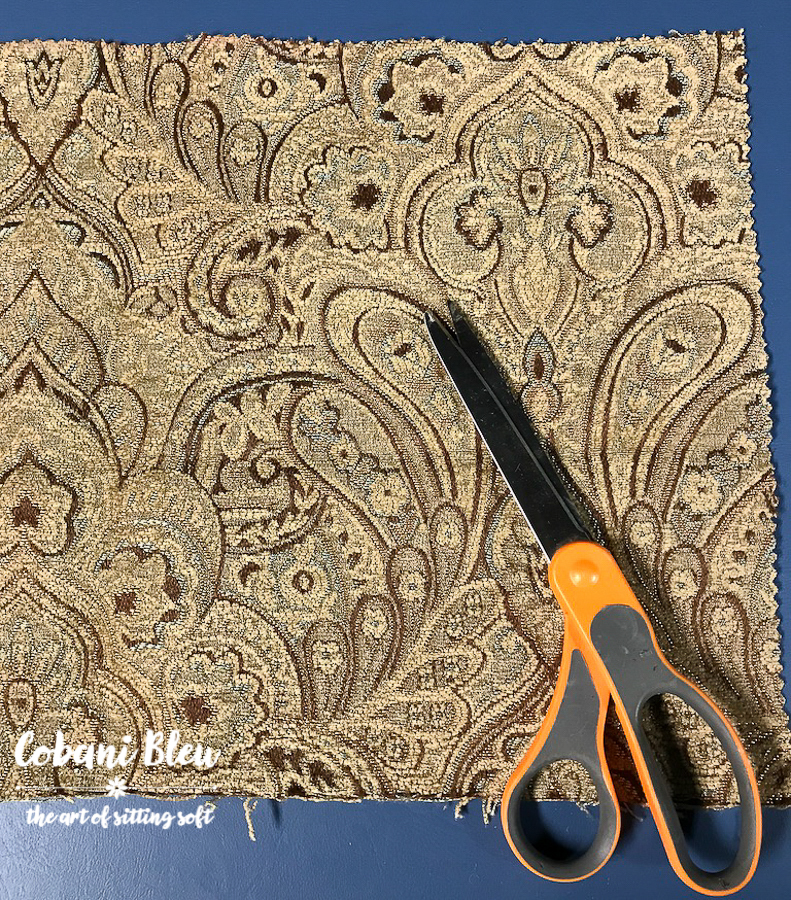
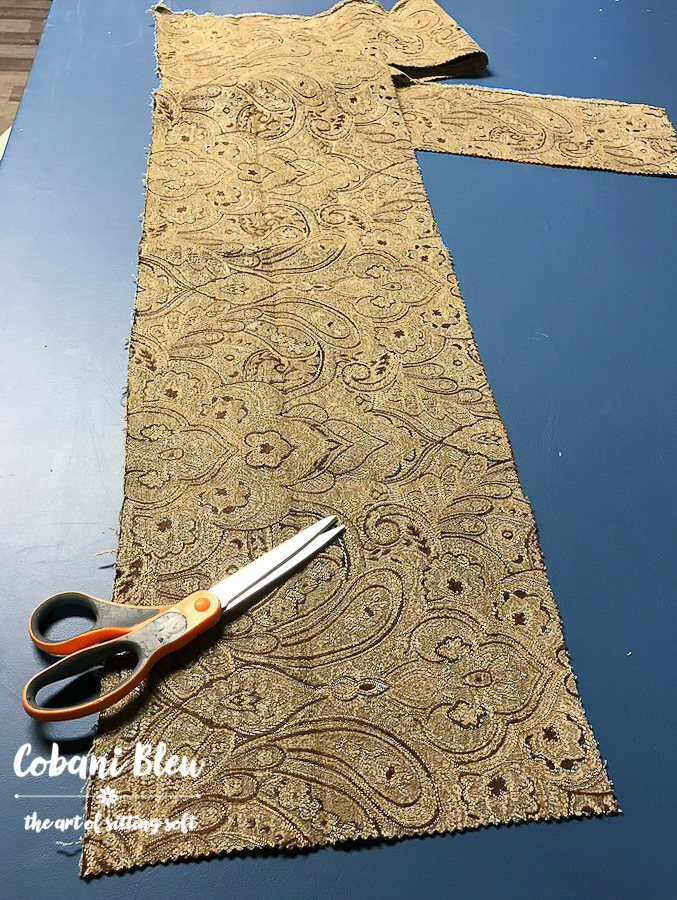
Now I thought there was plenty and after Dwayne decide this was it, I realized it would be really tight! I mean really tight to have enough. But after studying the cut layout, I figured out how to make it work. I needed to sew some alternate fabrics on it for pulling but it worked. Being tight on fabric always adds another level of stress to a project. Now we probably could have gone with a different fabric, but I’m glad it worked out. Dwayne was really pleased with the fabric choice. Here’s all that was left after completing Dwayne’s chair!
Issue #3
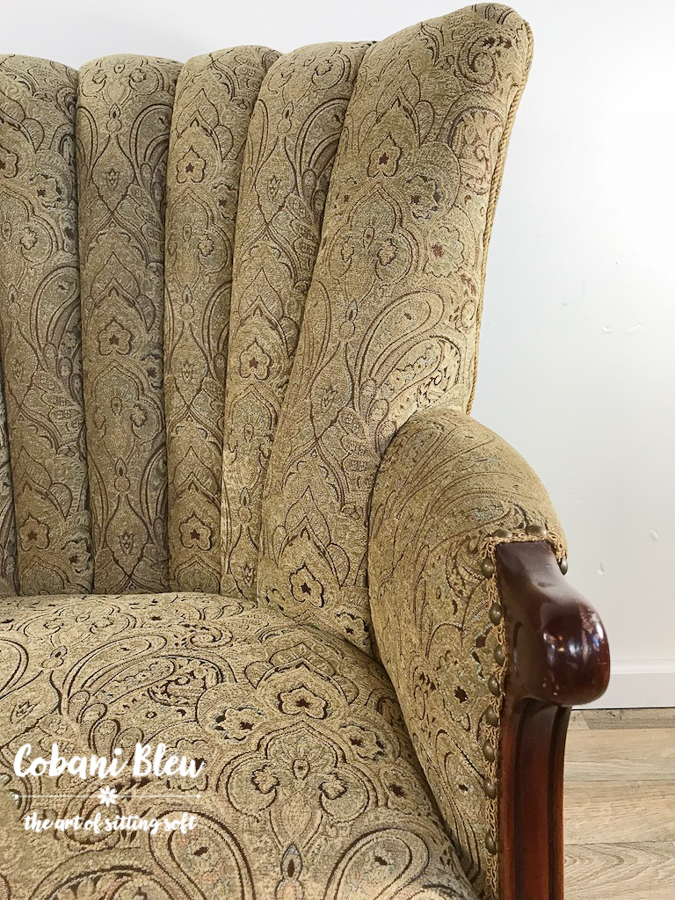
Here is where the real trouble began. Well not really trouble as much as ‘what the heck do I do now?’. When I stripped the chair, I realized the channels had no backing, only a front cover. Usually, channel backs are created when the front fabric is sewn to a backing in vertical channels and then stuffed. This whole piece is then attached to the chair back and wrestled into place.
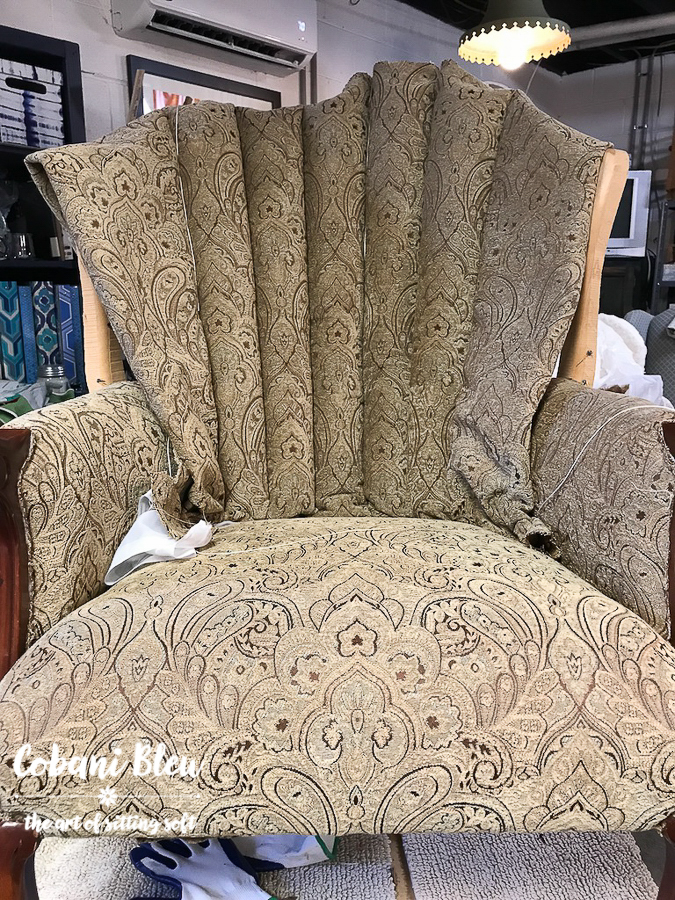
The back piece is not the same size as the front, that would be too easy. I had my front and back diagrams from class and its clear, the back fabric is smaller than the front. So I came up with a plan to make the back proportionately smaller than the front, similar to the chair measurements I worked on in class.
So I measured out the backing fabric, cut it, sewed it and stuffed it! It was a no go! The channel back pad/cushion I made was not wide enough to cover the back of the chair! Well that’s not fun! Hence the seam ripper workout. And back to square one.
This post contains affiliate links. For more information, please see my Disclosures here.
Now I know I could have called on Cynthia, but I really wanted to figure this out on my own. I’m stubborn like that. I turned to my upholstery books. Only one had an in depth discussion on how to create a channel back if you have no existing channel back to use as a pattern. That book is Spruce A Step By Step Guide To Upholstery And Design by Amanda Brown.
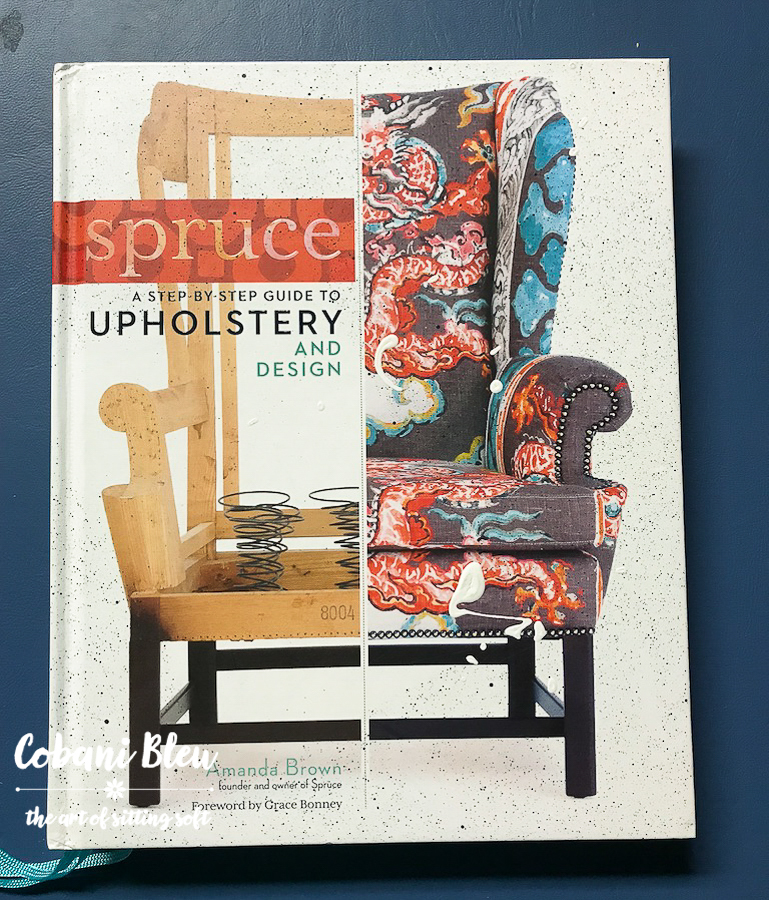
(Don’t mind the blue spray paint splattered on the cover. This books gets referenced a lot and is rarely put away, so sometimes it’s in the path of ‘projects’! Haha!) Right there on page 106, instruction # 11 was my answer.
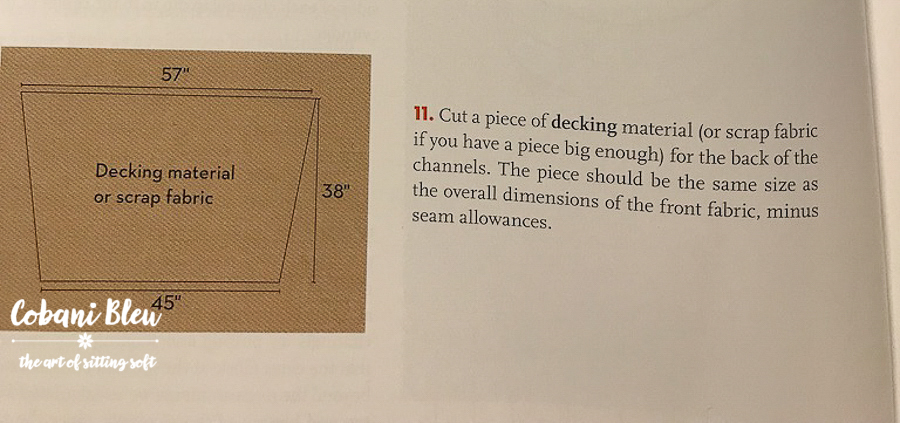
Amanda said the front and back should be the same except to leave out the seam allowances. I tried it her way, and it worked out perfectly! Whew!
Dwayne’s chair is finished. We met at a Cracker Barrel parking lot to exchange it.
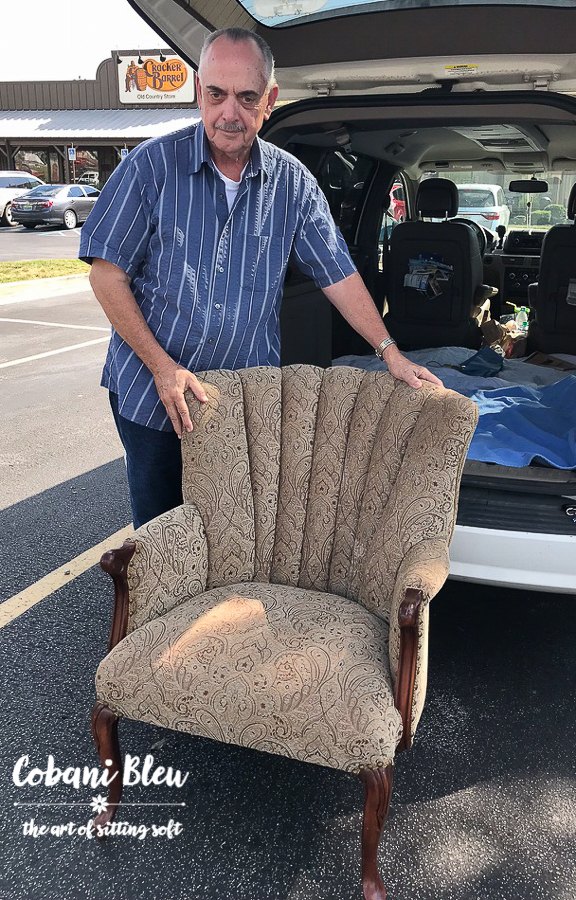
He couldn’t believe the transformation. Before he saw the chair he thought he would give it to his daughter as a house warming present, but once he saw it there was no way he was going to part with it. Dwayne is a happy camper and he is so pleased to show off his chair to his friends. And when sitting in it, he still thinks it is the most comfortable chair ever. This is a why I love to do upholstery!


Nancy, I am always so impressed with your furniture transformations. You have such a talent for reupholstery and I am always blown away!
Oh thank you Sherry, you are so sweet! I really love to reupholster furniture and especially love working with fabrics! Thanks for stopping by!
Nancy
Gorgeous, Nancy! Old furniture is sometimes like old shoes… you want them to be repaired, instead of trying to find something to replace them because they are comfortable! My uncle had a booming cobbler shop business in a retirement city… lots of retirees that wanted to keep their old, comfortable shoes! 😉
It’s so funny that you say that cause I have just worn out the second pair of the most comfortable shoes ever! They were prefect for standing on the hard concrete in my she shop. I wore they daily for two warm weather seasons. They were made by a small company that got sold out to a larger company and of course these shoes are no longer made!! BOO!
I was so afraid that after I recovered Dwayne’s chair, he wouldn’t find it comfortable but he loved it!! Thanks for checking out my post!
Very nice. Am about to tackle one of these in the next couple of months. Just picked up the Spruce book…it is very helpful.
Hey Grace, I’m glad you enjoyed this article. My very favorite instructor, Cynthia Bleskacheck of The Funky Little Chair is releasing a video this month (September 2020) on the channel back chair. I don’t know the details yet, but following her or my page. As soon as I know something I will post it. Her videos are so well done and worth every penny. It’s like being in a hands on class with her. I for one attend to purchase it as my notes are pitiful and my mind is even worse, so it will be a great resource. You should check into it if your going to tackle a channel back for the first time.
Thanks for stopping by!
Nancy
Hi
You’ve done some great work!
I am currently reupholstering a chair and thought about making the channel back horizontal instead of vertical. Have you ever done something like that – fanning from narrow to wider from bottom to top?
Not sure how it may look so not likely to do it.
Thanks for any feedback you can offer
Hey Roberta,
I don’t believe I’ve done a channel back as you’ve described. If you decide to try it I’d love to see a picture of it. If you have questions I’m happy to assist if I can. Good luck on your project.
Thanks
Nancy
I’m working on one now. I love your finished product. It looks so comfy which is what I strive for.