
Design Bleuprint: The Ultimate Guide to Stripping Furniture
Stripping Furniture of it’s old layers of fabric is probably the #1 reason many upholstery projects are never completed.
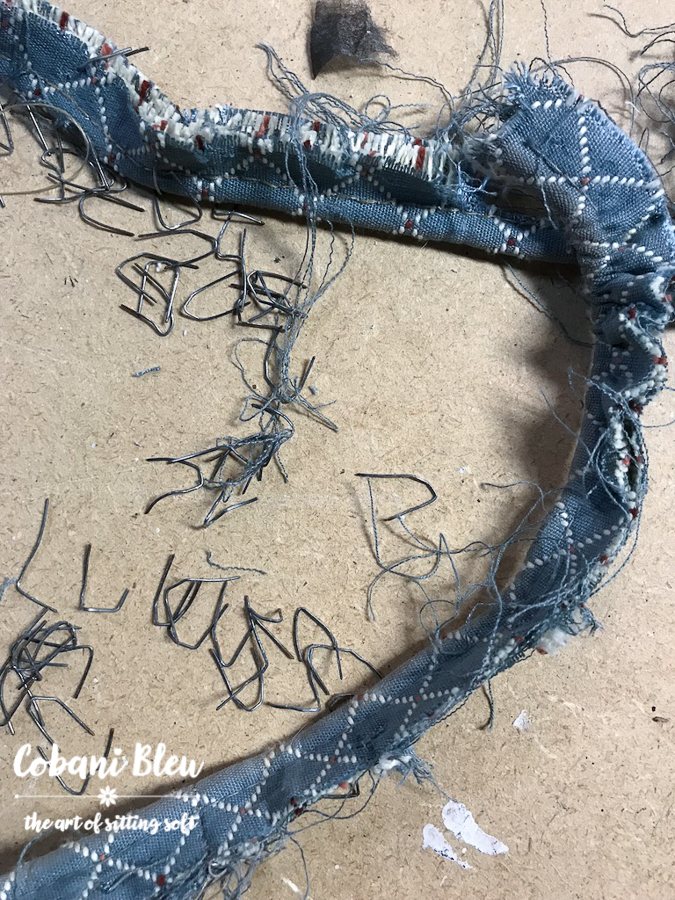
Stripping Furniture is hard work. There are only about a gajillion staples to remove, and the dust, dirt and debris! It’s truly groudy!! That’s a word right. You know what I’m talking about. Decades, if not centuries of food crumbs, dirt, hair, all neatly tucked into the nooks and crevices of old furniture. (Just another reason, gloves are part of my toolkit!)
Well I’m hear to tell you, with a little guidance, a couple of tools and some tips and tricks, stripping furniture doesn’t have to be daunting! Dare I say, it could even by enjoyable? Ok, maybe that’s taking it a little too far, unless your a stripping geek like me! Ooh that sounds sort of weird! But seriously, I just sort of get in the ‘zone’. I’m sure it must be sort of like that ‘zone’ runners get into, but as I am definitely not a runner, I can only imagine. But I digress. Let talk stripping!
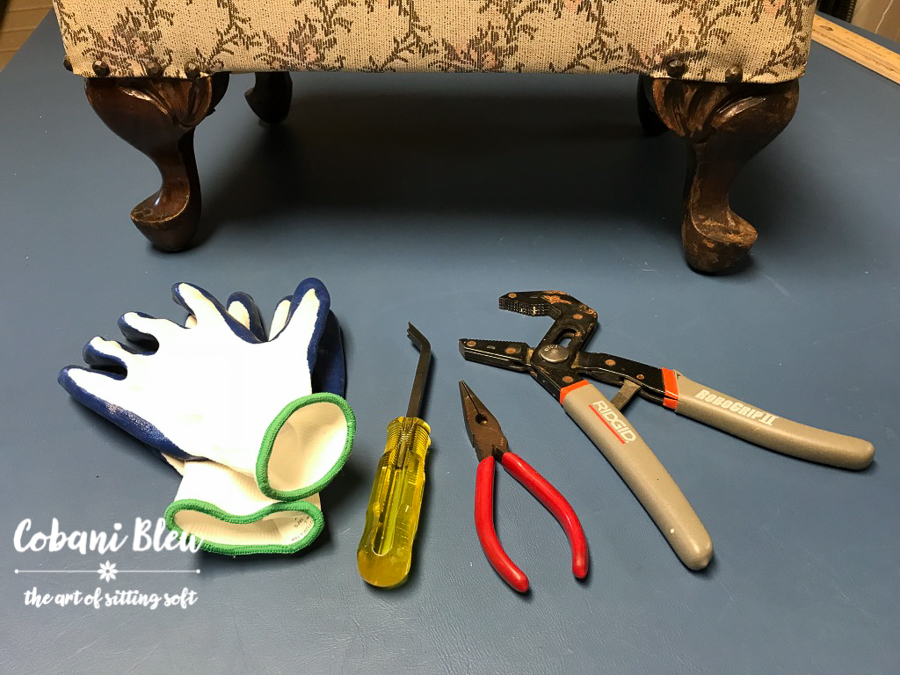
Here are my basic stripping furniture tools.
This post contains affiliate links. For more information, please see my Disclosures here.
Only one of these is a specialty upholstery tool, but it’s one of the most important tools you can have in your upholstery toolkit. It’s the stapler lifter, the one with the yellow handle. I sing it’s praises in my Top Five Upholstery Tips for Beginners. I can’t imagine trying to do upholstery without this tool. And yes, I’d definitely recommend this $24 tool, before I’d advise you to invest in a pneumatic stapler and air compressor. You can get your very own here.
The other tools here are common hand tools. The needle nose pliers is invaluable in pulling out staples once you have pried them up with the staple lifter.
The pliers are great for grabbing onto trim or welt cord and pulling it off. You can also use it to rip the fabric off. I’ll show you how that works shortly. Any pliers will work, but I love the pliers shown here. I don’t have a great deal of upper body or hand strength so this type of pliers really helps grab the fabric or trim and holds on to it. I didn’t know what these pliers were called until I found them on Amazon. They are a Self-Adjustable Groove Joint Pliers. They have a spring type mechanism that really clamps down on the fabric and ups my ability to rip the fabric or trim off.
The final item here are my favorite work gloves. Blue of course! You may not need these, but as I am pulling the staples out with needle nose pliers, I twist my hand and pliers in a prying motion. This motion quickly results in a blister on my hand. The gloves completely eliminate the blister. They also help protect you hands from scratches from broken staples and splinters. I think these come a packs of 10 sets of gloves for about $10. Super cheap. They’re also my favorite gardening glove. The rubber coating provide enough protection and gripper action but the fabric backing allows for breathability.
Two other items not pictured here are a face mask and a small hammer. Stripping furniture, especially older pieces, will stir up an incredible amount of dust that is probably not a good idea to breath in. The hammer is used to tap down any broken staples that can’t be pulled out.
I also highly recommend a speaker (or speakers) that you can play some tunes on, it really helps with the zoning out process, you may even break out in song and dance with you dog! Who knew stripping furniture could be so fun!
Stripping furniture is a very good learning process.
As you strip the layers, you are hands on with how the fabric was applied, how it covers the frame, where it is stapled, where cuts were made in the fabric etc. It’s probably one of the best learning tools you will ever have. Once you learn some basic skills, you can really up your upholstery skills by stripping furniture.
So let’s get down to business. It’s easiest to strip the furniture in the opposite order of how the fabric was put on. That is because, as fabric is applied, layers are built up. It doesn’t make sense to try to strip the inside arm off until you have removed the outside arm, since the outside arm fabric is covering the inside arm. Hope that makes sense, but as you are actually stripping furniture it will make perfect sense. It becomes very logical.
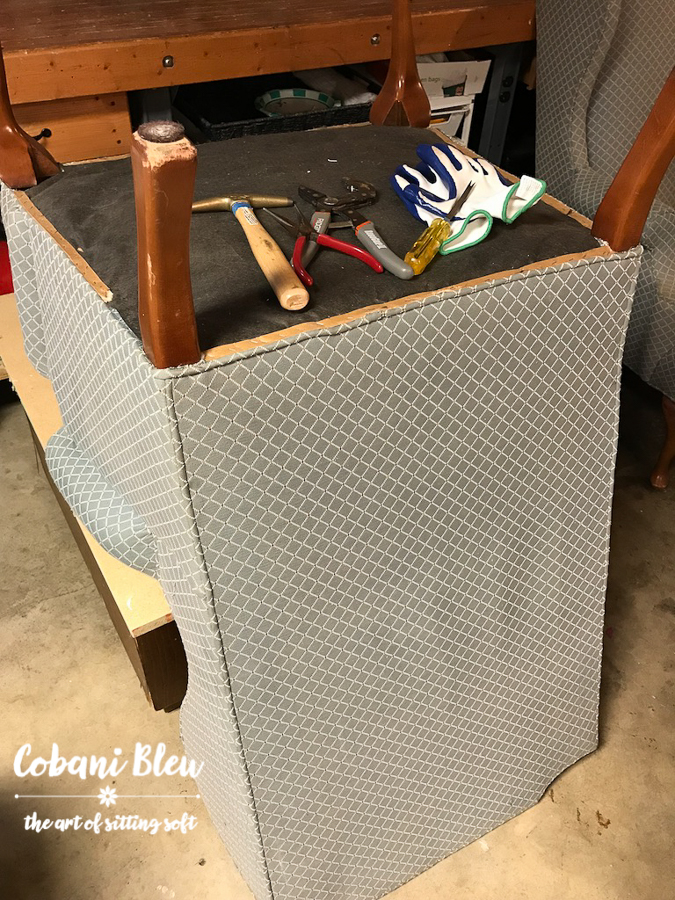
To strip a chair, turn it upside down and remove the dust cover first. Then I loosen all the fabric that is stapled to the bottom of the chair.
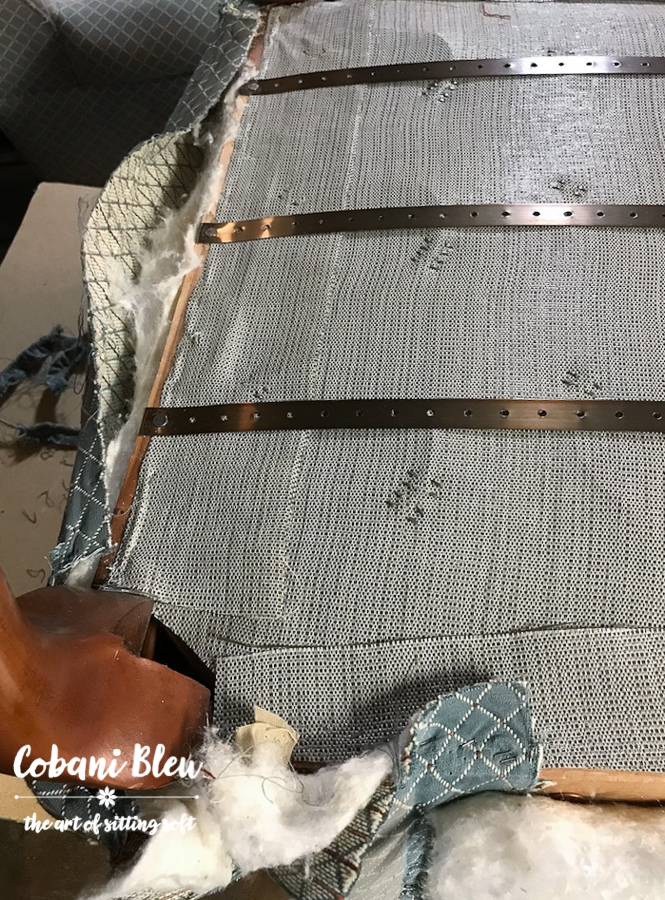
Next I work on the outside back and arms. Then you can remove the inside arms and inside back. Finally, the decking can be removed. To learn more about the parts of a chair check out this post here. If you’re lucky you won’t find multiple layers of fabric beneath the top fabric. It is common, that if the furniture is in good shape, it may just be reupholstered over the old fabric. At some point though, the foundation of the chair (padding and springs) need to be replaced and there is no way to do that without removing all the layers. Every layer means more staples. You may even reach back in time, to when tacks were used to attach fabric instead of staples.
The older the chair, the more history it shares. The fabrics that were in vogue decades ago, the types of padding, springs, webbing and tacks vs. staples. They all tell a story. I find this interesting. Do you? Or do you just want to be done with all the staples and dust and dirt!! I hear ya!!
Let’s see what this looks like!
This first video shows you the staple lifter in action.
The next video shows how to remove the welt cord from a chair using the pliers. It is faster to rip the welt cord off, but sometimes the staples are pretty darn tough and just don’t want to let go. When this happens, I grab onto the end of the welt cord and roll it off. This will leave exposed staples that can then be easily and quickly removed with the needle nose pliers.
Here I share with you, a little about my workflow. I think once you get going, it moves pretty fast.
The last video shows how easy it is to strip the chair back.
There you have it! All my best tips for getting out a gajillion staples. Have you ventured into the world of upholstery? Do you have any stripping furniture war stories? I’d love to hear them!
In our next Design Bleuprint series, we are going to talk about measuring a chair for fabric! See you soon!


Upholstery is something I’ve always wanted to learn how to do, but I admit to being intimidated by it.
I’m saving this post for reference later.
Thanks for stopping by Lisa! I know upholstery is intimidating at first, but once you learn a little bit, it really is pretty logical. And so much easier than making slipcovers! I hope you’ll give it a try!
Thanks for the excellent tutorial. This will help so much on my next upholstery project!!!
Thanks Michelle, I’d love to see some of your upholstery projects!