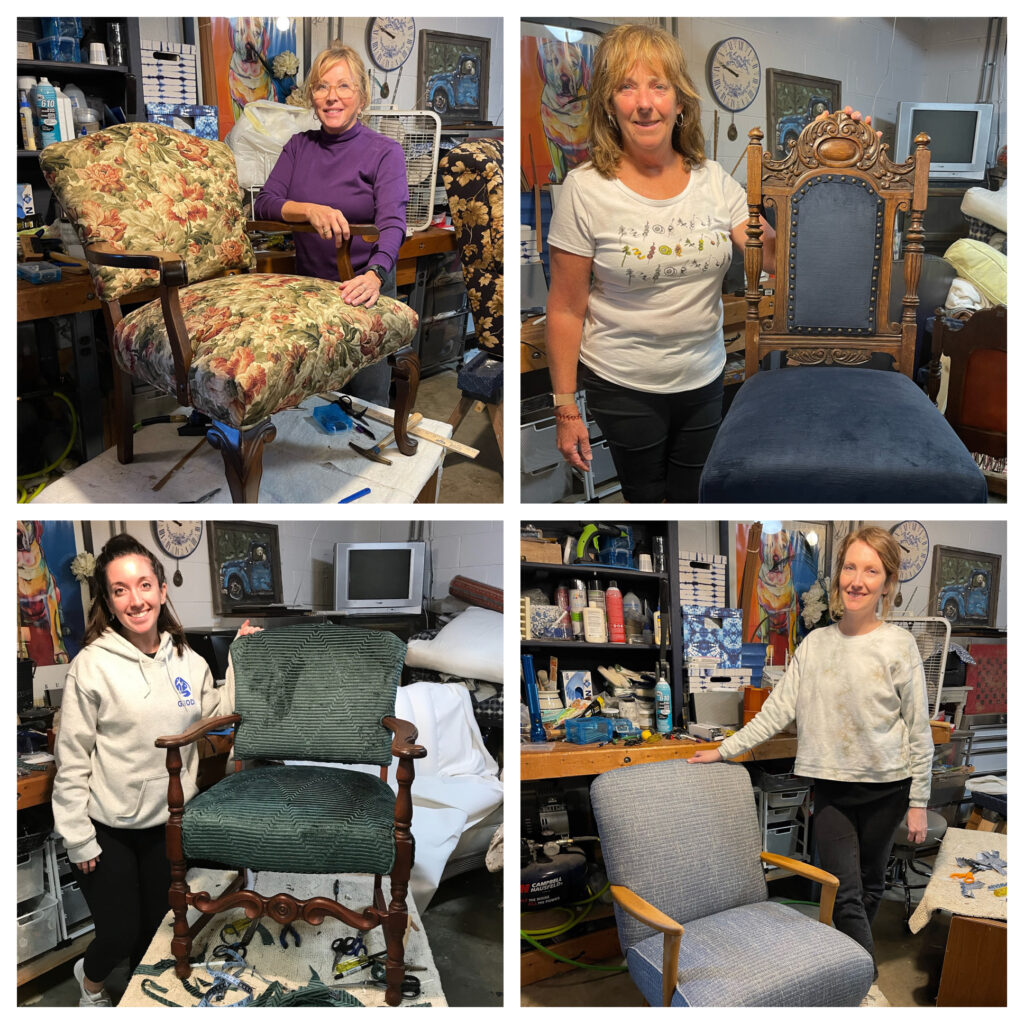
A Simple Chair: The Perfect Place To Start
If you’ve ever thought about trying your hand at upholstery, a simple chair is the perfect place to start
But what exactly is a simple chair? For our purposes, it’s a chair with an upholstered seat and back, typically with a wooden frame and no upholstered arms. There are plenty of styles that fit this description—think French Louis-style chairs, cottage-style chairs, or even sleek mid-century modern designs.
So, what can you learn from reupholstering a simple chair? A lot.
Step One: The Tear-Down – Learning How Chairs Are Built
Before you can put anything new on your chair, you have to take off the old upholstery. And this is where you start learning the real structure of a chair. As you strip away fabric, staples, webbing, and foam, you’ll begin to see exactly how it was put together in the first place.
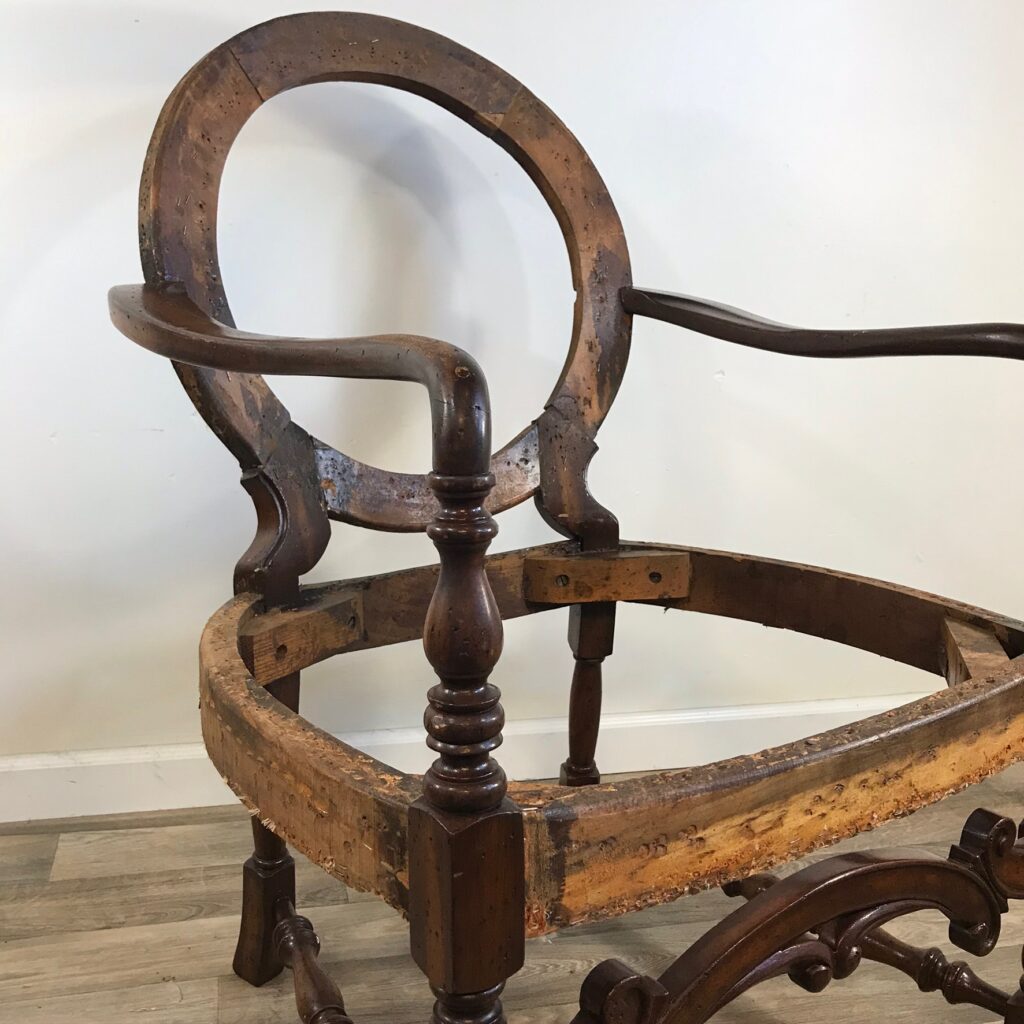
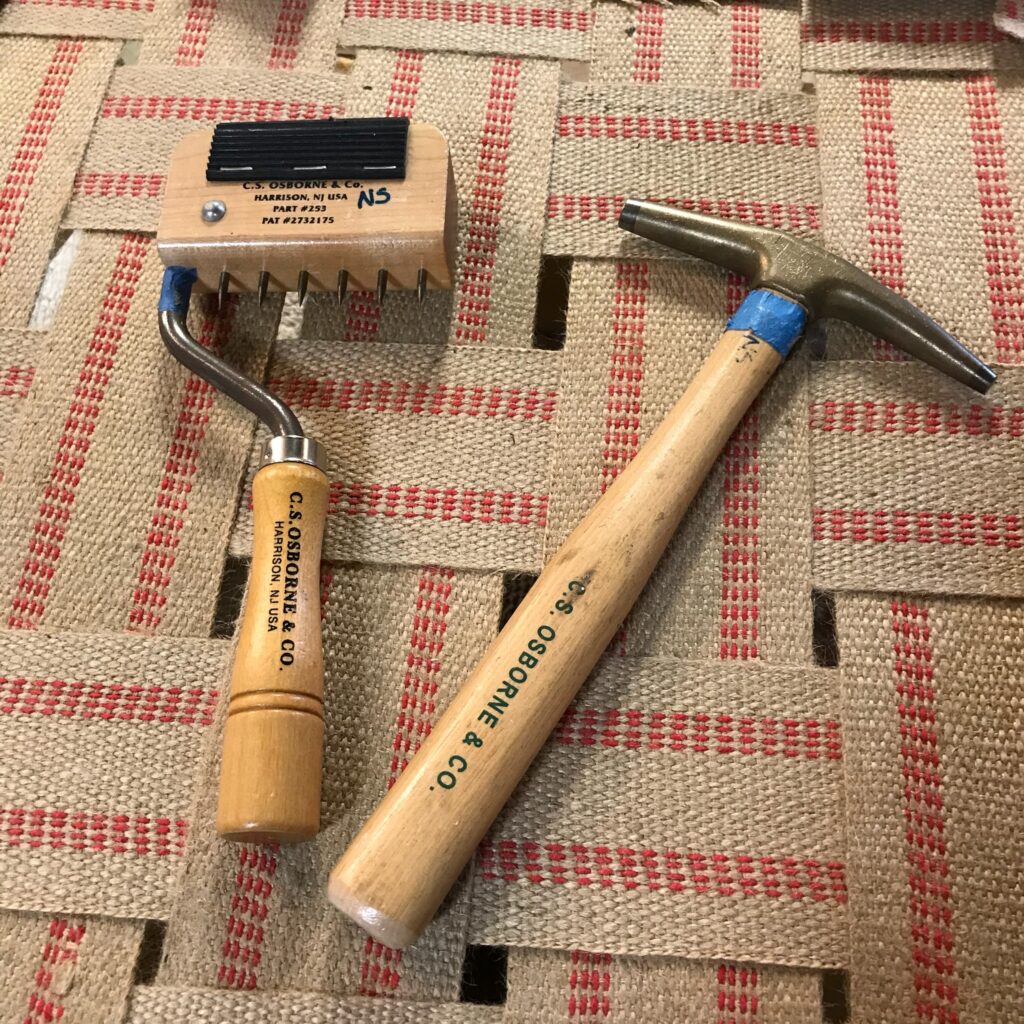
This step also teaches you the best ways to remove old materials efficiently. You’ll get hands-on experience with the right tools—staple pullers, needle nose pliers and a small hammers —so you’re not just yanking fabric off blindly but working strategically to prepare the frame for its transformation.
Step Two: Building a Strong Foundation
Once the chair is stripped down, it’s time to rebuild the foundation. This is one of the most important parts of upholstery—it’s what gives your chair structure, support, and comfort.
Here’s what you’ll be working with:
- Webbing: This is the first layer of support, creating a sturdy base for your seat.
- Foam: you’ll learn all about the density and firmness/softness numbers to help you pick the right foam for your projects
- Cotton and Dacron: These materials help smooth out the shape and create a soft, finished look.

Each of these components plays a role in making sure your chair is both comfortable and long-lasting.
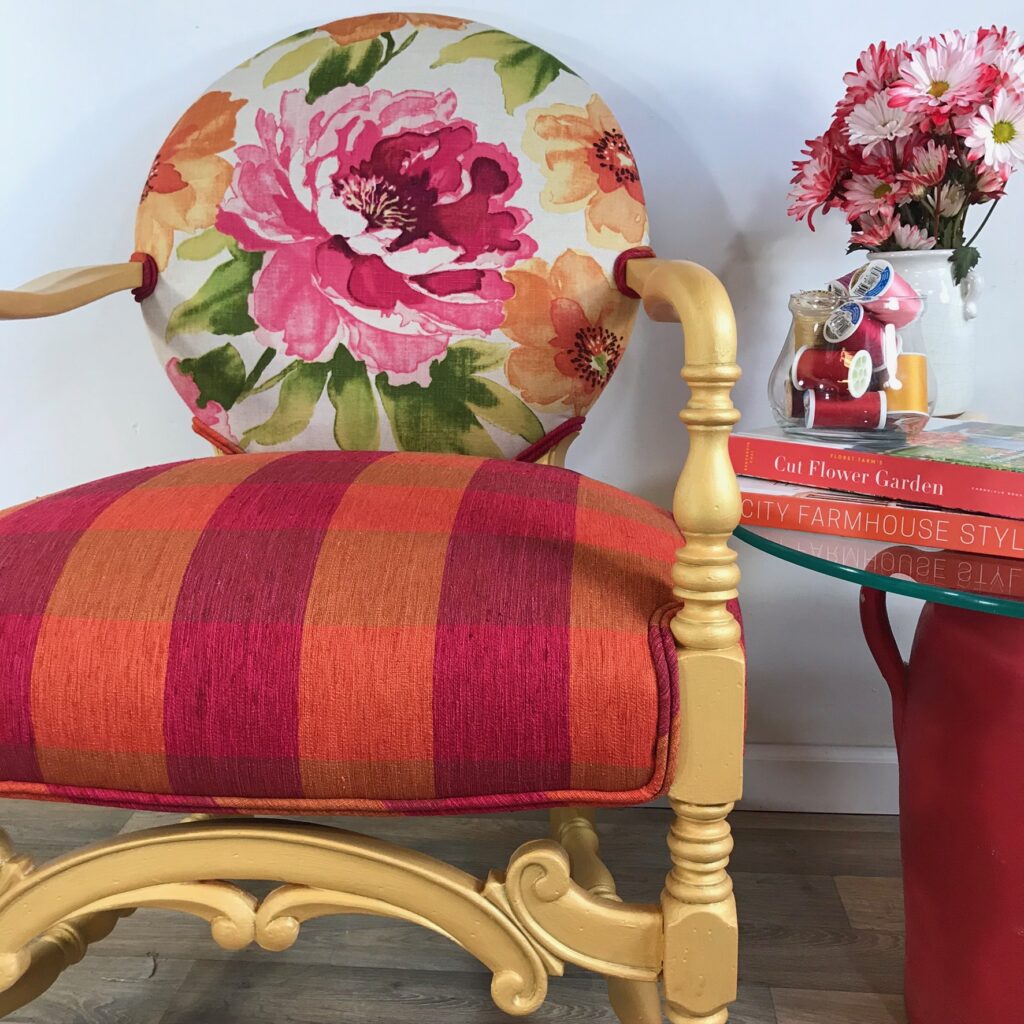
Step Three: Applying the Fabric – Learning the Tricks of the Trade
Now comes the fun part—putting on the fabric. This is where you’ll really start to see your chair come to life, and it’s also where you’ll learn some key upholstery techniques:
- Tensioning the Fabric: Getting a smooth, professional-looking seat requires pulling the fabric just right—tight enough to avoid wrinkles but not so tight that it distorts the shape.
- Easement Cuts: These small cuts allow the fabric to wrap smoothly around the frame, especially around curved areas like back posts and arms.
- Using Ply Grip and Tack Strips: Depending on your chair’s design, you may use these materials to get clean, crisp edges without visible staples.
- Adding Welt Cord: You might learn to sew and attach single or double welt cord for a polished, professional finish.

Bonus Points: Working with Patterns (If You Dare!)
If you’ve chosen a patterned fabric, you’ll get an introduction to pattern matching—aligning the design so it flows across the seat and back. While pattern matching can be tricky, working on a simple chair is a great way to start understanding how to position fabric for the best results.
Getting Comfortable with Upholstery Tools
Throughout the project, you’ll also get familiar with essential upholstery tools like:
- Pneumatic staplers
- Air Compressors
- Industrial sewing machines vs a home sewing machines
- Specialty hand tools staple pullers, webbing stretchers and regulators
And if you’re wondering where to find the best tools and materials, don’t worry—we’ll cover where to source everything you need.
The Best Part? A Beautiful Chair in Just a Few Days!
By the time you finish upholstering your chair, you’ll have learned an incredible amount about upholstery techniques, materials, and tools. And the best part? You’ll go home with a chair that you transformed—one that you can be truly proud of.
So, are you ready to dive into the world of upholstery? A simple chair is just the beginning!